
This section of Getting Started assumes that:
- You have recently installed Bitvise SSH Server.
- You have learned about how the SSH Server is used with Windows accounts and virtual accounts.
- You would like to configure the SSH Server to provide access to Git repositories.
Versions of Git
Before we can configure the SSH Server to provide access to Git, we must install Git.
A Windows version of Git can be downloaded from a number of sources. The SSH Server recognizes two main types:
- Versions of Git that are like Cygwin.
- Versions of Git that are like msysGit.
In this guide, we will use the Git that comes with Cygwin. We will do this for two reasons:
- The author of this guide likes Cygwin.
- Cygwin makes it easy to also install a version of OpenSSH that cooperates with Git.
Download Cygwin Setup
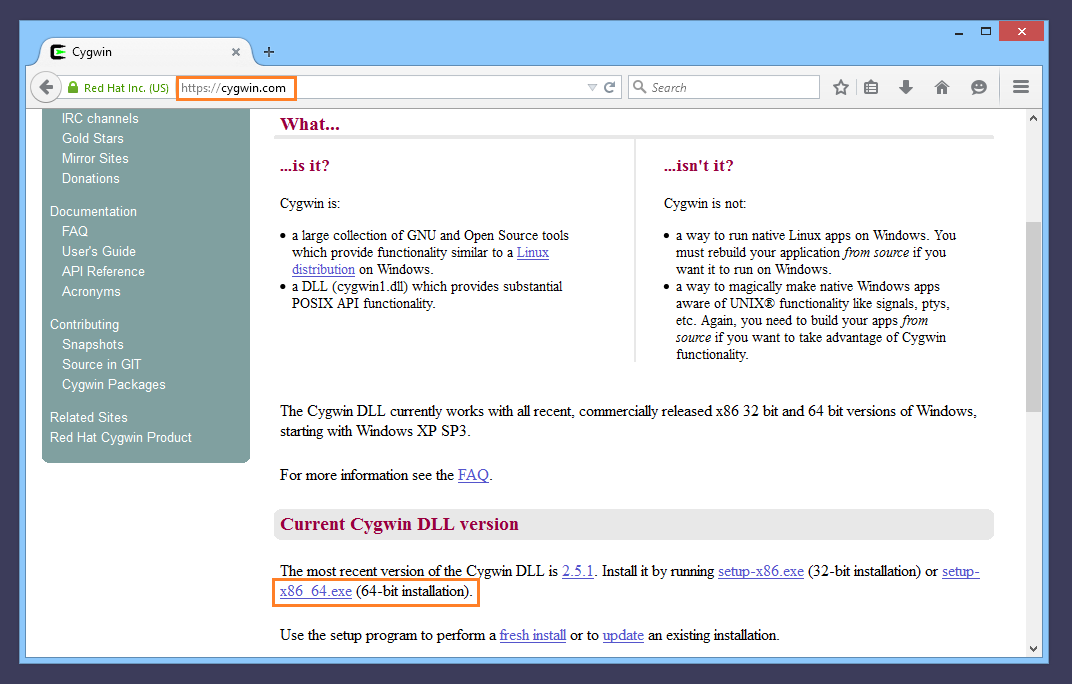
To install Cygwin, we navigate to Cygwin.com. We have a 64-bit system, so we download the 64-bit installer:
At this time, we will be installing Cygwin on the same computer where the SSH Server is installed. You may later also install Cygwin Git and OpenSSH on one or more client computers.
Run Cygwin Setup
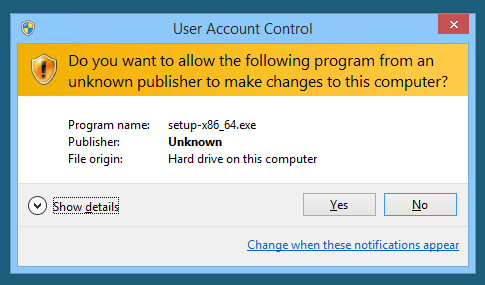
To install Cygwin, you will need administrative permissions. Unfortunately, at the time of this writing, the installer is not digitally signed:
We have not yet downloaded Cygwin files, so we choose Install from Internet:

We choose default options for the Cygwin Root Directory and the Local Package Directory:


Choose Cygwin Download Site
After selecting our connection type, we must select a download location:

Unfortunately, at the time of this writing, no secure download locations are available. We hope that this will be improved.
Select Cygwin Packages
We arrive at Cygwin package selection. Do not select all packages: if you do, the installation will be extremely lengthy, and the download extremely large.
We will keep packages included by default, and add Git and OpenSSH:


The package versions will likely be different at the time you install. Simply choose one of the available latest versions.
Accept Dependencies
Once we have added the packages git and openssh, we click Next. We are asked to select additional dependencies:
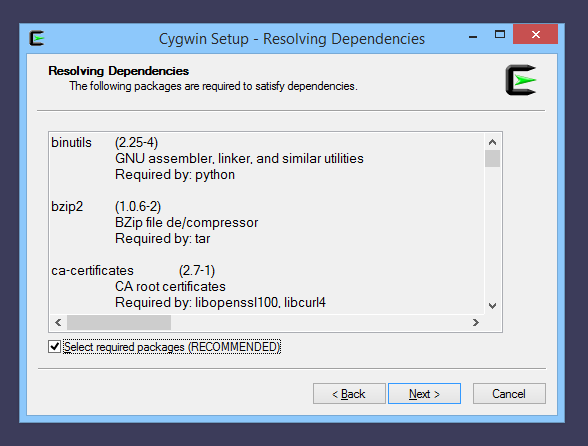
It is recommended to select them, otherwise things may not work.
Complete Cygwin Installation
After clicking Next again, Cygwin begins the download and installation. This may take a handful of minutes with an average computer and network connection. The installation concludes as follows:

Add Cygwin to PATH
After installing Cygwin, an important task remains: add the Cygwin binaries directory to the Windows PATH environment variable. Cygwin does not do that itself.
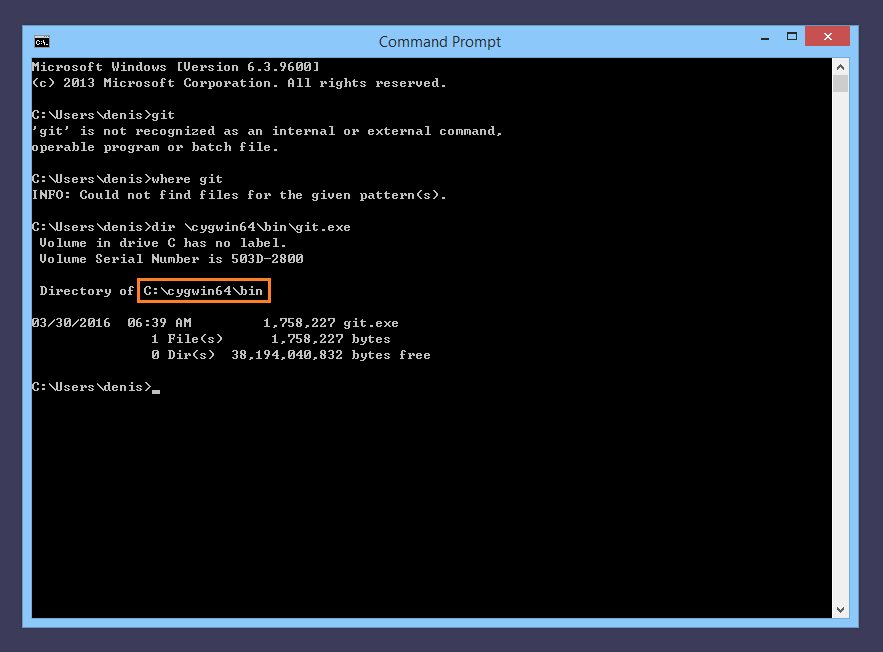
Until we address this, we can't execute Git from a Windows Command Prompt, but we can find the executable under C:\cygwin64\bin:
The fastest way to the interface to edit system environment variables is using the Windows Start Menu search:
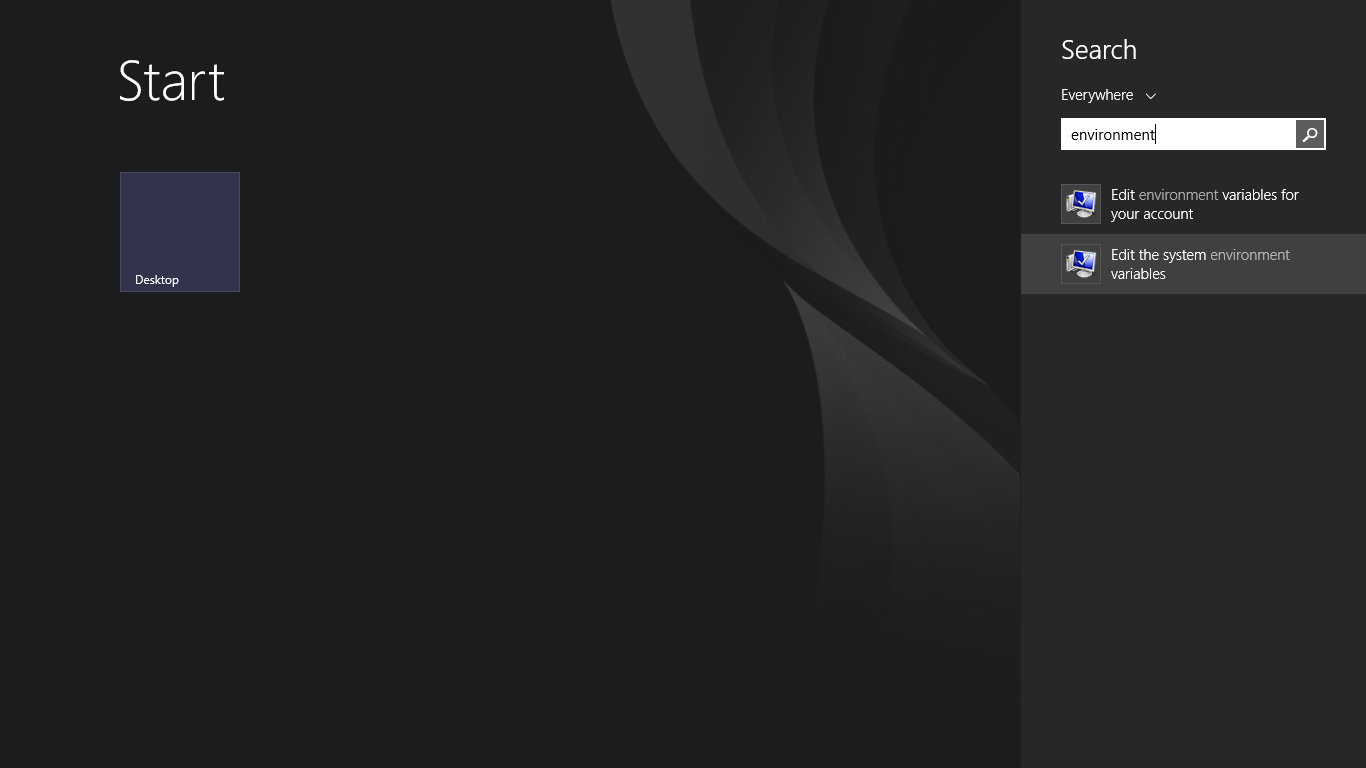
This launches the System Properties dialog, where we open Environment Variables:
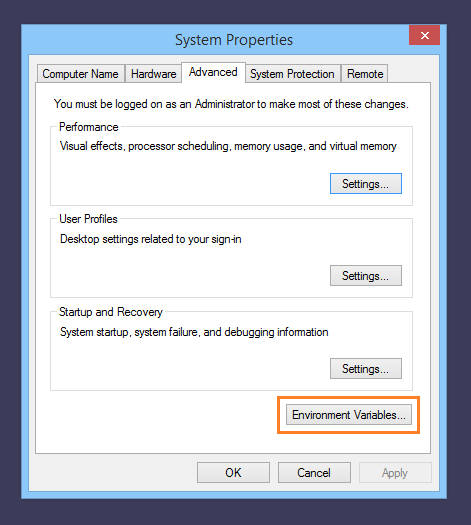
Under System variables, locate Path, and append:
;c:\cygwin64\bin

The path to append will be different if you chose a different Cygwin Root Directory. Make sure this is the path where git.exe and ssh.exe reside.
After confirming the PATH change, open a new Command Prompt window. (Any previous window will still use the old PATH.) Verify that we can run git and ssh without path qualification:

Create a root directory for Git repositories
It is a good idea to designate a directory (other than C:\) to contain Git repositories. We will use Windows File Explorer to create the directory C:\GitRepos:

Check Windows permissions
We will be using virtual accounts with the default security context. We therefore need to ensure that the Windows account BvSsh_VirtualUsers can access files and subdirectories in our Git repositories directory:

The Windows account BvSsh_VirtualUsers is a member of the Users group, but this group does not have Windows filesystem permissions to write to C:\GitRepos. We will need to add permissions to allow this.
Configure Windows permissions
Still using Windows File Explorer, we will use Advanced Security Settings to grant Windows filesystem permissions to the contents of C:\GitRepos to the BvSsh_VirtualUsers account:

We have identified the account for which we want to add permissions. We configure them as follows:

This will allow virtual accounts to have full control over the files and subfolders stored under C:\GitRepos; but not over the root directory itself.
Create a virtual account
We can now add an SSH Server virtual account that will be accessing Git:
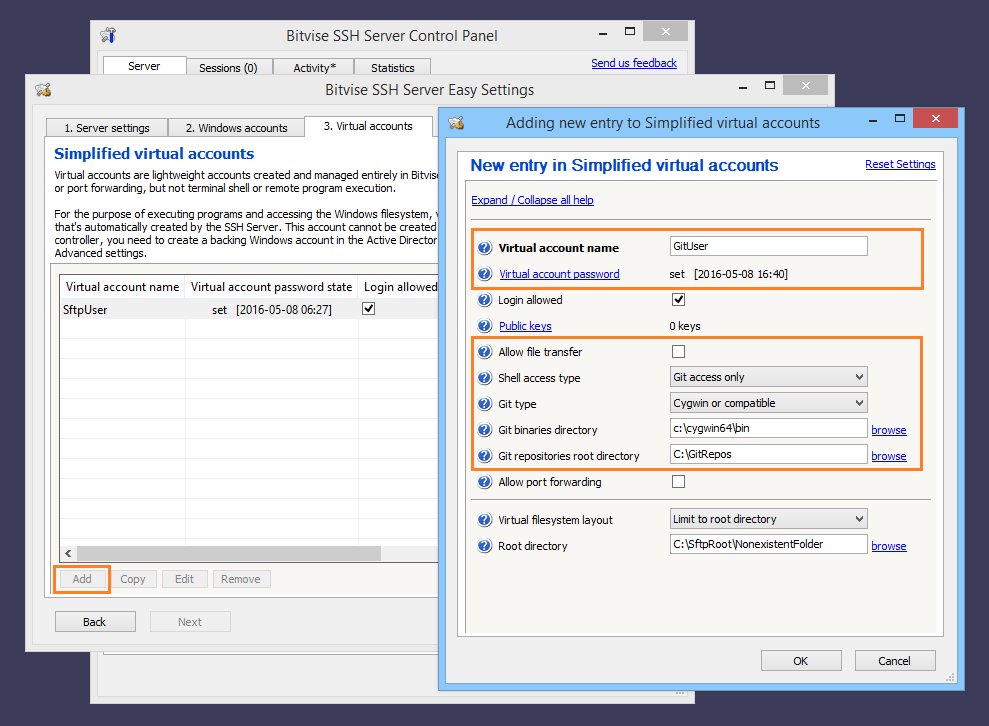
Note that we have disabled file transfer, but still configured a nonexistent SFTP root directory. This may help in case someone mistakenly enables the Allow file transfer option.
Port forwarding is already disabled for virtual accounts by default.
First connection: Cygwin home directory
Before trying to use OpenSSH, check whether a Cygwin home directory for our current Windows account exists yet. If it does not, start Bash with the "-l" option to create it:

First connection: Host key verification
Before attempting to connect, check the SSH Server Control Panel, and make sure that the SSH Server is running. If it is not, start it.
If the SSH Server is started, we will use OpenSSH to connect to it:
- Using the GitUser account we have created.
- To address 127.0.0.1 - the IPv4 "localhost" interface.
- To the port number we configured in the SSH Server. If the server were accepting connections on the default SSH port, we would leave out the parameter "-p 47506".
The resulting command line is:
ssh GitUser@127.0.0.1 -p 47506

OpenSSH is alerting us that the SSH Server's host key must be verified before the connection can be trusted.
Verifying the host key is crucial to the security of the SSH session. If the host key is not verified, anyone with the ability to hijack network traffic will be able to intercept the SSH session. This could be an ISP, or anyone in proximity when using a wireless connection.
To verify the host key, compare the SHA-256 fingerprint - highlighted in the screenshot - with the fingerprints shown in the SSH Server Control Panel:

When verifying the fingerprint:
- The entire fingerprint must match.
- If you check just the beginning or end, it is easy to fake a fingerprint that matches only in those digits.
- Favor the SHA-256 version of the fingerprint, if both the client and server make it available.
- If SHA-256 is not available, check Bubble-Babble.
- MD5 is the weakest version of the fingerprint, and should not be relied on unless there is no other form.
First connection: Authentication
If we have approved to trust the SSH Server's host key, OpenSSH will next ask for the user's password:

If we enter the password correctly, the SSH session will then fail with:
shell request failed on channel 0
This is expected, and indicates a safe configuration. The account is meant to be used for Git access only, and does not provide a terminal shell.
Create a repository
Let us now create an empty Git repository. Navigate to C:\GitRepos, and run:
git init --bare testrepo

We have created the repository. But before we use it - let's run Windows File Explorer. Check if permissions are correct:
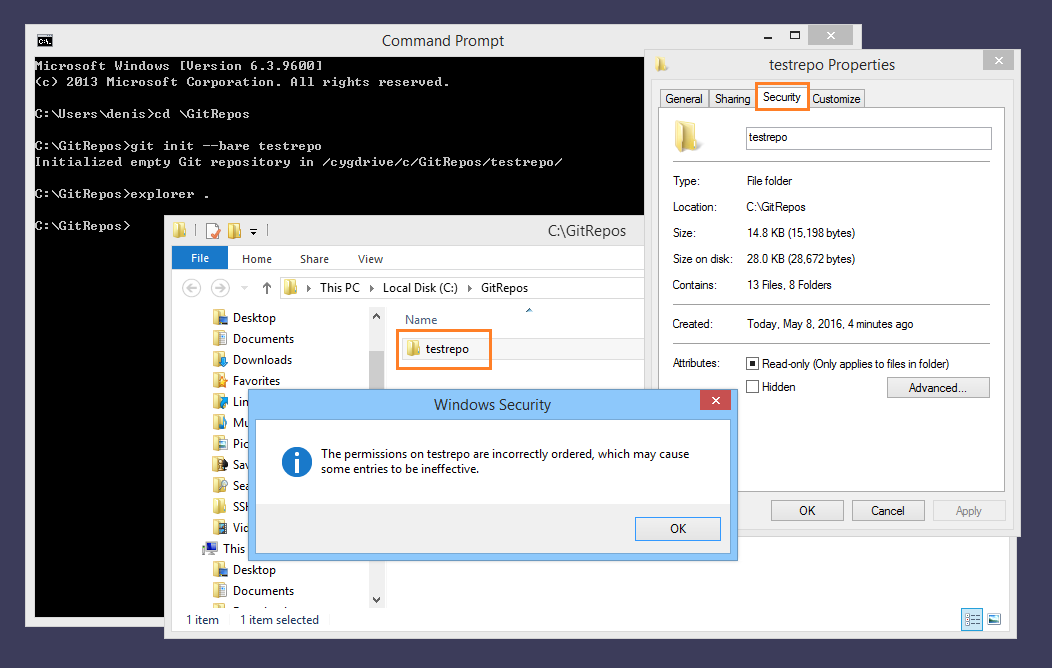
Yikes. Let us just reset permissions from our root, C:\GitRepos:
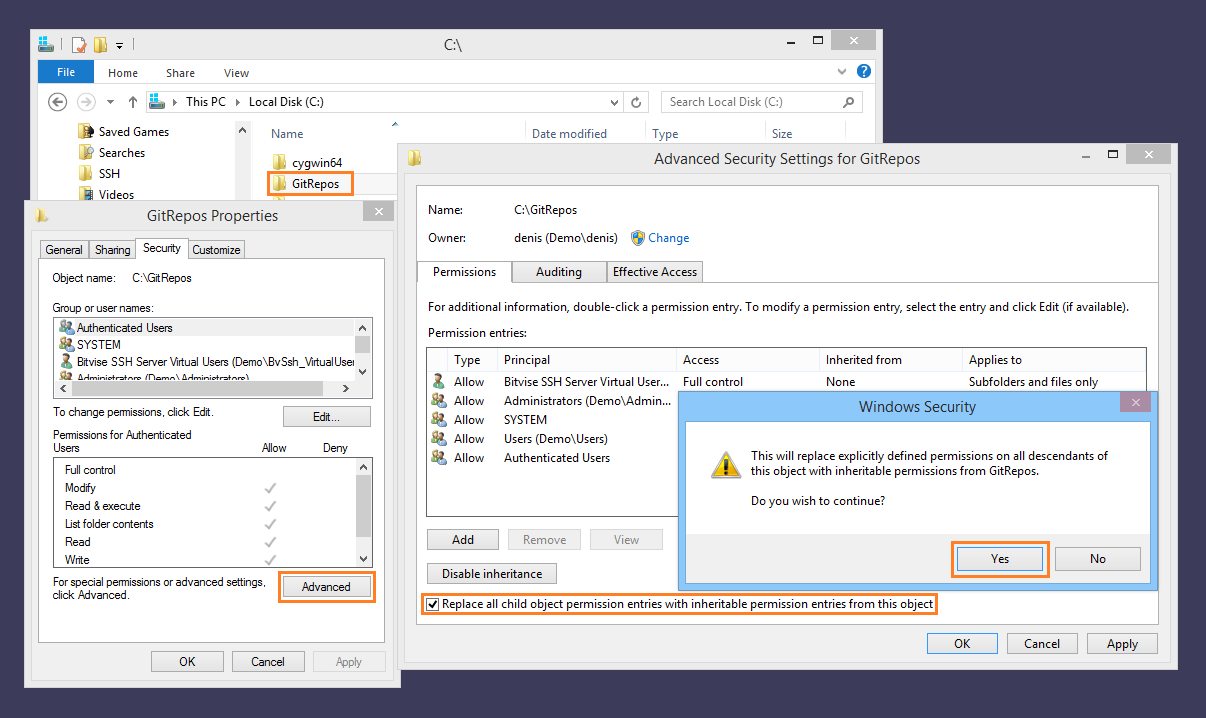
Let us now re-check permissions on testrepo:
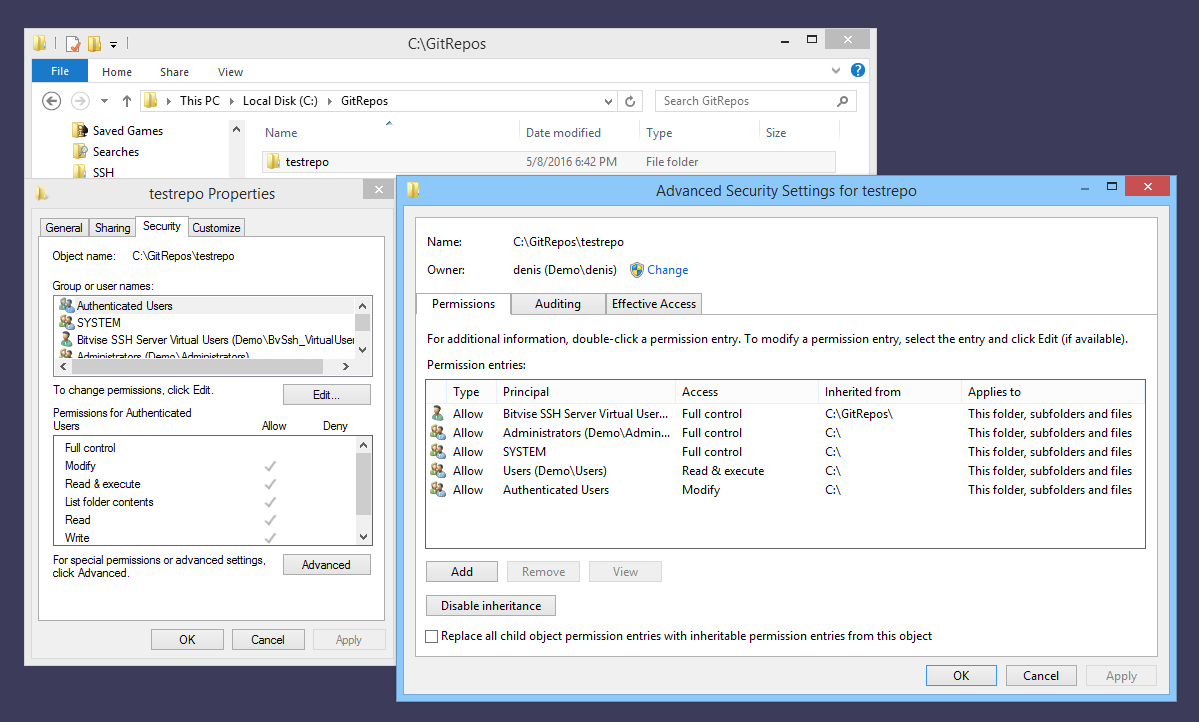
That's better.
Clone the repository
We can now clone the repository via SSH. To test this still on the same computer, we run:
git clone ssh://GitUser@127.0.0.1:47506/testrepo

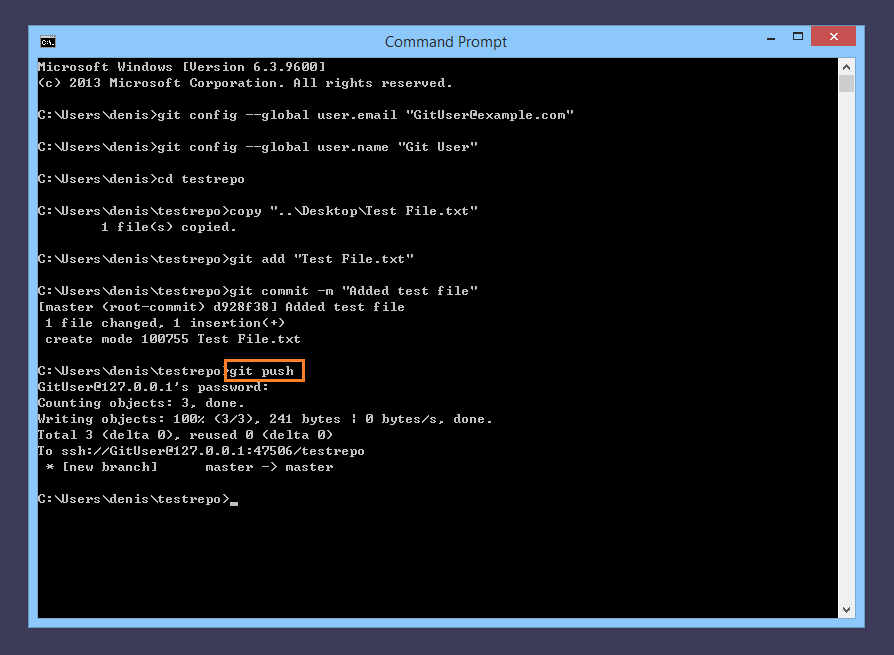
We can add a first commit, and push:
No comments:
Post a Comment